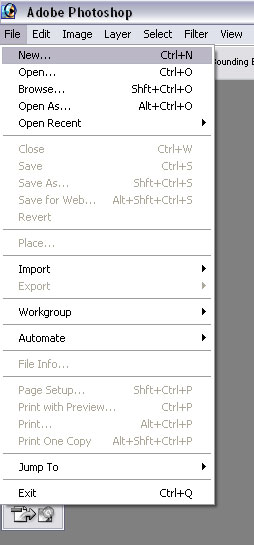
Web Design Graphics Return back to Seattle Web Design homepage. Tutorial#1: Using Photoshop to make Navigational Buttons Step#1: Open a new document in Photoshop. Go to file>New or press CTRL+N.
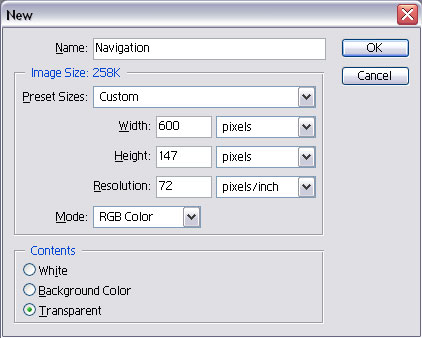
Step#2: It will open a box where you can mention the width and height for your navigational menu. I have chosen 600 (width) x 147(height) pixels at a resolution of 72 pixels/inch. Mode is RGB and background is transparent although you can choose white as well. Name of the file is Navigation.
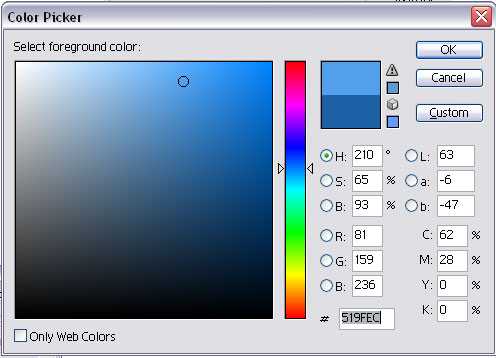
Step#3: Here’s the interesting part. You need to think of the color for your navigation menu. You can choose a single color or two colors. I chose 2 colors: The foreground color is #1C61A6 while background color is # 519FEC using the color picker. Both are shades of blue.
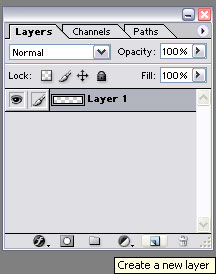
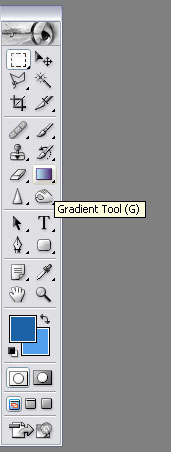
Note: You can choose the color picker by simply clicking on the color boxes shown in the Photoshop menu as shown above. Step#4: Now choose a new layer by clicking on the layer icon on the layer’s palette as follows. Once the new layer is there, pick the Gradient tool from the Photoshop tool bar.
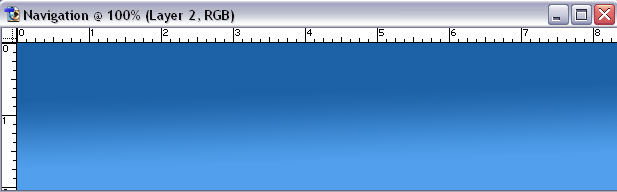
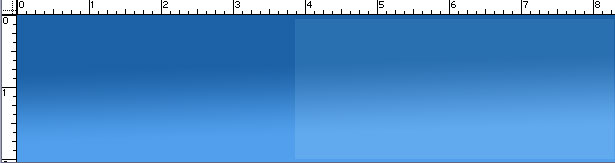
Step#5: Now drag the gradient tool (linear gradient) on your new layer from top to bottom. This is the result:
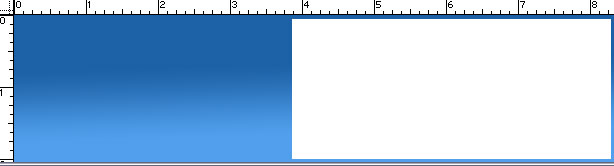
Step#6: Add another layer (layer 3). Create a rectangle
on the layer using the Rectangular Marquee Tool
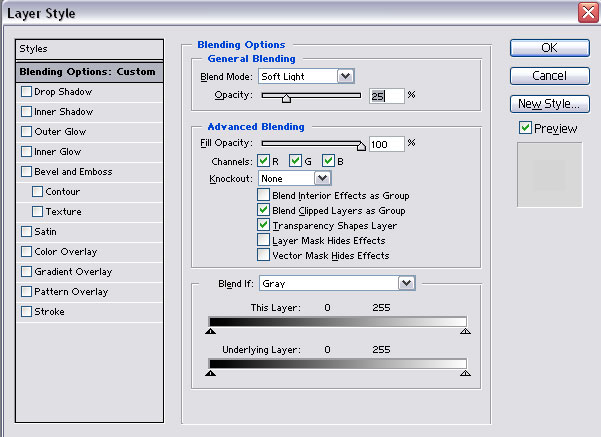
Step#7: Now you need to change the opacity of the layer to 25% and change the blend mode to soft light. To do this, you can right-click on Layer 3 to bring up the Layer Style window. In the Layer Style window, Change the Blend mode to soft light and the opacity to 25%. Here’s how you do it:
Your navigational menu should look like this:
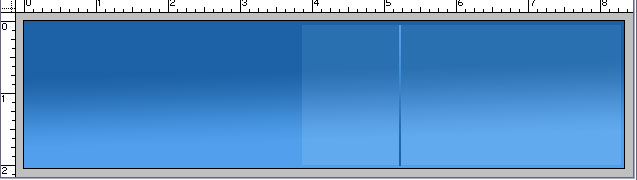
Step#8: Now you will need to add a separator between
your links like Home| About Us This is how it will look:
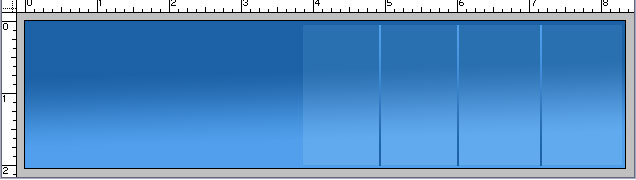
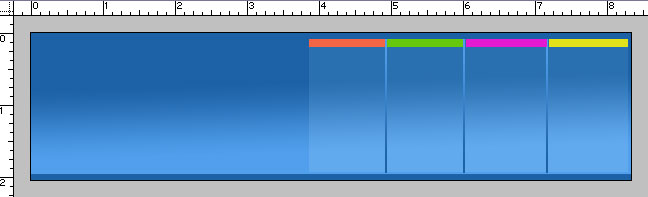
Step#9: Now use CTRL+J to copy the layer depending on the number of links you require. I need 4 links, so I copied it twice. Now place the separator equidistant from the previous separator. It should look like this:
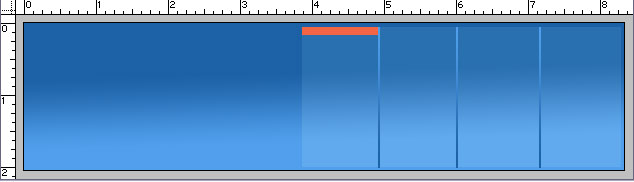
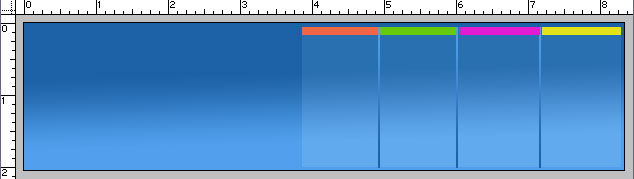
Step#10: Now let us proceed towards adding some detail to the navigation. Make a new layer and use your Rectangular Marquee tool again to select the space between two separators. Choose a color. I chose # F36544. It will now look like:
Step#11: Use CTRL+J to copy the layer. Select the
layer by holding CTRL while clicking the layer. Now choose your foreground
color and use the Paintbucket Tool
Step#12: To spice up the look of the Navigational Menu, we will add a dark blue border. To do this, open a new layer. Now use the Rectangular Marquee to make a selection at the bottom of your Navigational menu or Header and fill it with Dark Blue. I used # 1C61A6
Step#13: To enhance it a little more, I opened another
layer. I took the Pencil tool
Step#14: Select the Text tool to name the different links. I took four links: Home/Services/Portfolio/Contact Us. You can choose the font and the color. I used #ECE6EC as my Font color. I also added a Text Logo on the Left side of the Header. After this, I downloaded some icons from the Internet. You can Google to find different websites, I downloaded them from http://www.glyphlab.com. Now the final Navigational Menu looks like:
You can use different colors for the Navigational menu depending on your choice.
|